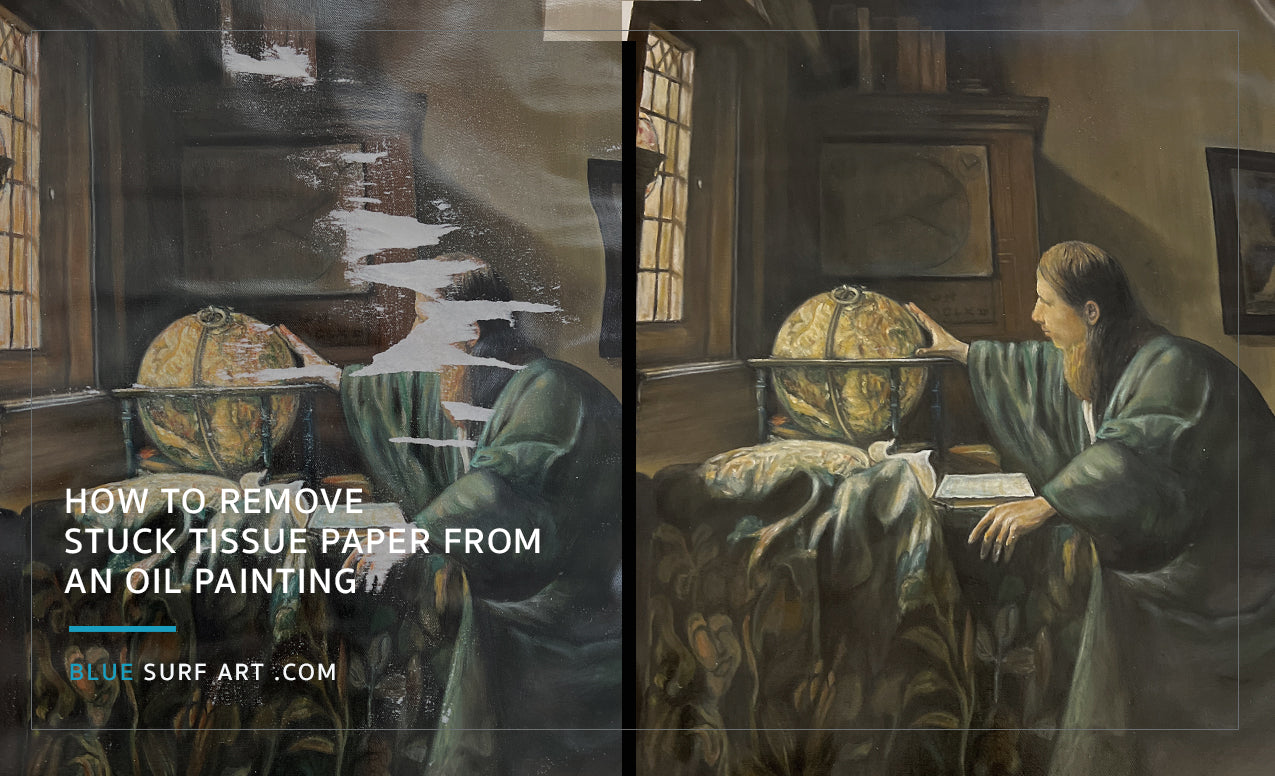
How to Safely Remove Stuck Tissue Paper from an Oil Painting
Title: How to Safely Remove Stuck Tissue Paper from an Oil Painting
Introduction:
As art lovers and collectors, we understand the distress that can accompany discovering a flaw on a beloved piece, especially when it involves something as delicate as an oil painting. One common issue that arises is when protective tissue paper becomes stuck to the surface of a painting, leaving behind unwanted residue. However, fear not! With the right approach and a gentle hand, it's possible to safely remove the tissue paper without causing harm to the artwork.
Here's our step-by-step guide to help you navigate this delicate process:
1. Assess the Situation:
Before diving into any removal attempts, take a moment to carefully examine the affected area. Determine the extent of the tissue paper's adhesion and whether any paint has already been compromised.
2. Gather Your Supplies:
To tackle this task, you'll need a few essential items:
- Odorless mineral spirits or turpentine
- Cotton swabs or soft, lint-free cloth
- Patience and a steady hand
3. Test in a Small Area:
It's crucial to proceed with caution, especially when dealing with valuable artwork. Before applying any solvent to the entire painting, conduct a patch test in a small, inconspicuous area to ensure compatibility with the paint.
4. Dampen Your Cloth or Cotton Swab:
Lightly moisten a cotton swab or cloth with a small amount of odorless mineral spirits or turpentine. The key here is moderation – you want the cloth to be slightly damp, not soaked.
5. Gently Dab the Affected Area:
With your dampened cloth or cotton swab, gently dab the area where the tissue paper is stuck. Allow the solvent to work its magic, softening the paper and loosening its grip on the painting.
6. Peel Away the Paper:
Once the tissue paper has softened, carefully peel it away from the surface of the painting. Take your time and proceed slowly to avoid causing any damage to the underlying paint layers.
7. Exercise Patience:
Removing stuck tissue paper from an oil painting requires patience and a gentle touch. If the paper doesn't come off easily, resist the temptation to force it. Instead, continue dabbing and peeling until the paper is fully removed.
8. Allow the Painting to Air Dry:
After successfully removing the tissue paper, allow the painting to air dry completely in a well-ventilated area. Avoid exposing it to direct sunlight or heat sources during this time.
9. Consider Professional Help:
If you're uncomfortable tackling this task yourself or if the damage seems extensive, don't hesitate to seek assistance from a professional art restorer or conservator.
Conclusion:
With the right approach and a steady hand, removing stuck tissue paper from an oil painting can be a manageable task. By following these steps and exercising caution, you can safely restore your artwork to its former glory, preserving its beauty for years to come.
Remember, when it comes to caring for your precious artworks, patience and gentle handling are always key.
Happy art preserving!
Kate/Bluesurfart.com
More from:
How to